


Introduction:
TRB145 is an LTE CAT-1 Gateway, equipped with RS485 interface. Compact design and installation make this gateway perfect for applications, where a sole gadget must be remotely controlled over RS485 serial interface. TRB145 is engineered to be used in industrial applications. This guide will tutor you on how to use Teltonika TRB145 with Fogwing Platform in simple and easy steps.
Description:
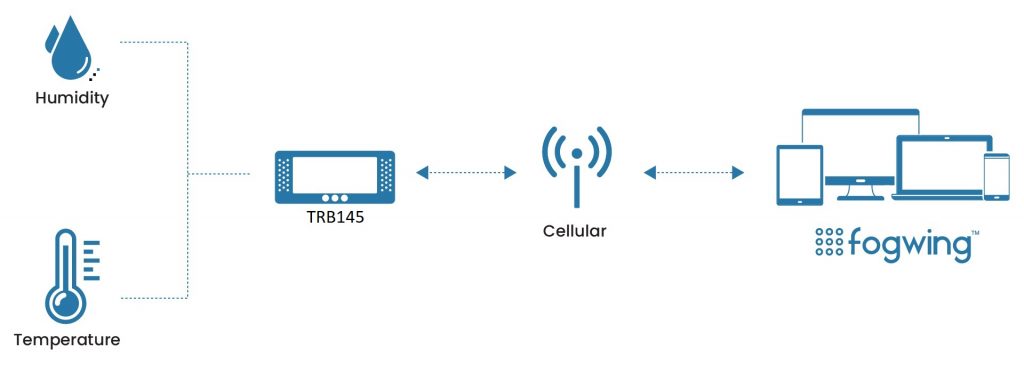
We have used XY-MD02 temperature and humidity sensor with Modbus interface to connect to Teltonika TRB145 that uses cellular network to connect to Fogwing Cloud. With the help of MQTT, we will send the sensor data in the form of JSON payload to Fogwing to visualize the data in real-time.
Requirements:
1. Signing Up to the Fogwing Enterprise Cloud
Step 1:
To create an account in the Fogwing Platform, please head over to this link and press the “Sign-Up” button. Fill the necessary details and tick the “I agree to Fogwing’s Terms of Use and Privacy Policy” and press the “Sign Up” to create a new account.
Step 2:
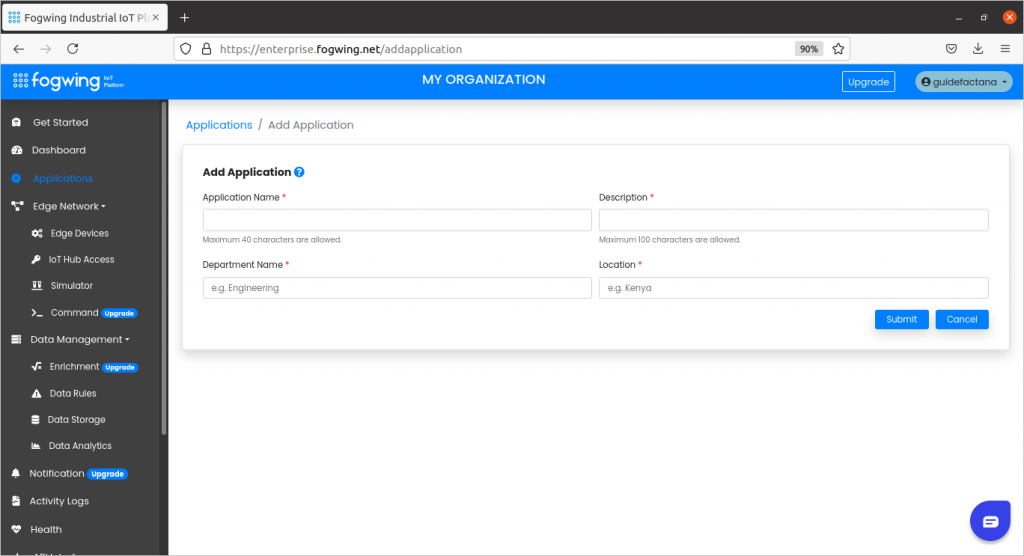
Sign in to the Fogwing Platform using your credentials to create Applications. Upon Login, you will land on the “Get Started” page. From the menu bar, click “Applications”, the Applications page will display. Click the “Add” button, fill all the fields and click on “Submit”.
Step 3:
This step involves the creation of Edge. From the menu bar in the Fogwing Platform, click “Edge Network”, and select “Edge Devices”. Edge Devices page will appear. Click the “Add” button, fill all the fields and click on “Submit”.

Step 4:
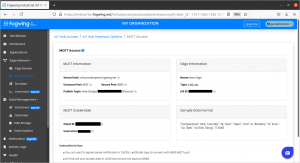
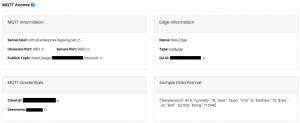
From the menu, click “IoT Hub Access”, the IoT Hub Access page will appear. Click on “Add” button, fill all the required fields and click “Submit”. To see available interface options, click on the eye icon and choose “MQTT Access”. You will see a screen like the one below, these details are useful while setting MQTT details in Teltonika TRB145.
2. Connecting XYMD-02 sensor
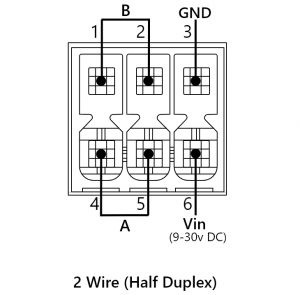
Refer the connection details below to connect the XYMD-02 sensor. We will be using the sensor in Half Duplex mode which requires only two wires A and B. To power up the sensor you can provide an external supply within the range 9 to 30V DC.
3. Configuring Teltonika TRB145
Step 1:
Connect the cellular Antenna in place and power it up with the Power Adaptor given with the package. To configure TRB145 connect the USB cable in place and connect it to your computer. Allow the device to boot up, it usually takes 30 seconds. If you are connecting Teltonika TRB145 for the first time Computer OS should detect the USB device and install the driver automatically. For more information you can check this link.
Step 2:
Once you have login to the WebUI make sure you have the latest version of the firmware which supports MQTT connection. We have tested it with the version TRB1_R_00.07.00.1 you can download the latest firmware image from here.
Step 3:
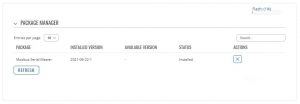
Now we need to check if the Modbus package is installed by heading over to Services >> Package Manager. It will be installed automatically once TRB145 connects to the internet.
Step 4:
Now move to RS485 section and make sure it is turned off. Because in TRB145 only one RS485 serial interface must be turned on at any time. We are making use of RS485 configuration present in the Modbus section.
Step 5:
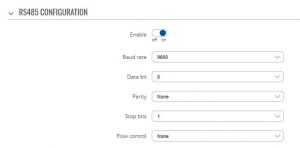
TRB145 will act as Modbus Master and Sensor will be the slave. To set the Modbus details click on Modbus and select Modbus Serial Master. Enable the RS485 Configuration by sliding the switch. Please refer the data sheet for more information. You can refer the image below for the configuration.
In the RS485 Slave Device’s List click on Add and set the Slave Device Configuration as shown below.

Now, we need to add the instances to the slave device. Each instance is the sensor parameter. We can create a separate instance for each parameter or we can have a single instance. In a single instance, the sensor values will be separated by a comma. In this tutorial, we will include the sensor parameter in a single instance.
In the Add, New Instance enters a meaningful name and click on Add. We will be naming it as a parameter. Once you click on Add it will be added in the Requests Configuration.

For better clarity, please refer the below details. You can find them in the sensor data sheet.
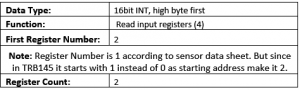
Important: Use the brackets for the payload in single instance to make it valid JSON payload.
And make sure you have turned this instance On. To verify everything is configured correctly scroll down to the Request Configuration Testing and click on Test.
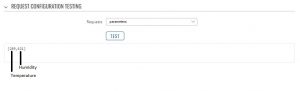
If you have set it properly you will see temperature and humidity values as shown above. Click on Save & Apply.
Step 6:
Now finally, we are ready to set the MQTT configuration into the Teltonika TRB145. Click on Data to Server. In the Data Senders, click on Add. To enable the configuration, slide the Enable switch to On. Fill the Name field and make sure the Data Source is Modbus data and the protocol set is MQTT.
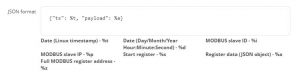
In the JSON format field, we will use timestamp (ts) and payload, you can try with other options too.
Note: Fogwing Cloud only accepts payload in JSON.
Make sure the Segment Count is 1 and Send as the object is turned On to receive the JSON payload as an object. Now, from the Fogwing MQTT Access page copy the MQTT configuration details as shown below..

And keep the default setting for other options. By default, 60 seconds is the interval to send payload to Fogwing Cloud, you can set it according to your convenience.
Slide the Use Credentials to turn it On. Then enter the MQTT Username and Password and click on Save & Apply.
Step 7:
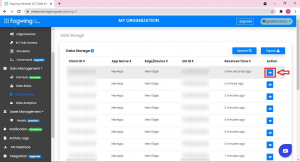
Now, you can visualize the data in Fogwing Enterprise Cloud by clicking on Data Storage. Press the eye icon to visualize the data sent from the TRB145.
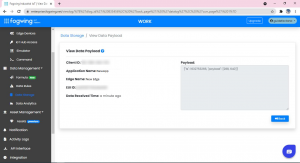
You can see the sensor data sent in an interval of 60 seconds. The data will be displayed as JSON payload, shown below.
Conclusion:
In conclusion, sending sensor payload to the Fogwing Enterprise Cloud using Teltonika TRB145 is fairly a simple process. Follow the steps given in this guide tutorial to make it work seamlessly.